
Winter Composting: Keep Your Pile Active Year-Round
Temperatures will decrease, and decomposition will slow down, but we can try to prevent freezing — a total stop. Planning for winter composting means planning to have MORE SPACE by doubling your capacity. If you have a 50 gallon tumbler that works at a great rate in the summer, then consider getting another tumbler for the winter.
Insulating your compost pile
Create insulating barriers around your pile using straw bales, leaves, or tarps to prevent heat loss while allowing airflow. Some composters construct temporary wooden frames stuffed with leaves to create dead air space—nature's best insulator. Others use rigid foam insulation boards arranged around bins, which can be removed and stored during warmer months.
Beyond external barriers, consider the pile's location. South-facing areas receive maximum solar gain, which can raise pile temperatures several degrees even on cold, sunny days. Windbreaks protect against heat-robbing winds—even a simple snow fence or planted evergreen hedge makes noticeable difference. Proximity to buildings may provide some radiant warmth, though avoid areas where snow slides from roofs onto your pile.
Don't forget the compost blanket technique. Cover your active pile with 6-12 inches of loose straw or leaves. This insulating cap traps rising heat while shedding precipitation. Remove it temporarily when adding materials or turning, then replace it immediately to minimize heat loss. Some composters use old blankets, carpet remnants, or thick cardboard as additional insulating layers beneath the organic mulch.
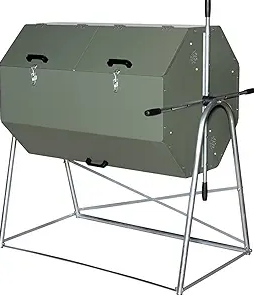
This is a Jora Composter, which works great in winter due to thick insulation and easy turning.
Managing Moisture and Aeration
Snow actually provides excellent slow-release moisture. As the pile's interior heat melts accumulated snow, water percolates through gradually rather than saturating materials. However, monitor for ice that blocks airflow and creates anaerobic pockets. Break these up during turning sessions.
Aeration presents winter's greatest challenge. If turning is necessary, choose mild days when materials aren't frozen solid. Turn outer materials toward the center where temperatures remain highest. This relocates undecomposed material into the active zone while moving finished compost toward cooler edges.
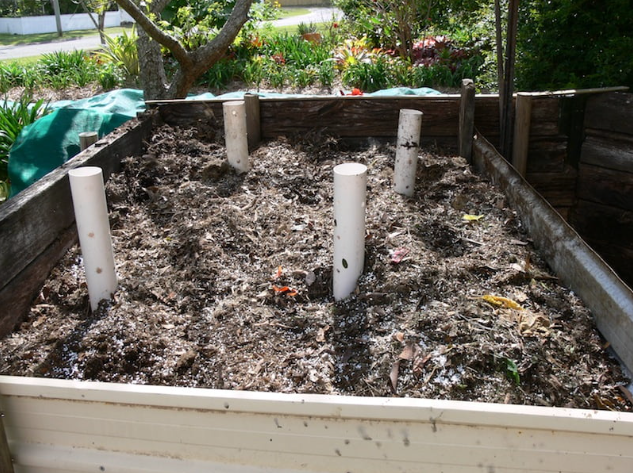
Consider installing permanent aeration structures. PVC pipes perforated with holes and inserted vertically create passive airflow channels. Some composters build wooden pallets into the pile's base, elevating materials off the ground and promoting air circulation from below. These systems maintain aerobic conditions without regular turning.
Don’t worry about your compost getting cold from air exposure! Decomposing bacteria need air to thrive, so it actually helps them to create heat.
Hot Composting Through Freezing Temperatures
Batch composting becomes especially important in winter.
Collect materials in frost-proof containers near your compost area. Five-gallon buckets with tight lids work perfectly for kitchen scraps, while large bins or bags store leaves and other browns.
When you've gathered enough material to add at least 12-18 inches to your pile's height, incorporate everything at once. This substantial addition maintains critical mass and prevents the temperature drops that occur with small, frequent additions.
Monitor internal temperatures with a compost thermometer.
Insert the thermometer into the pile's center to track core temperature. Usually you would aim for 130-150°F, but for the winter the goal is to simply avoid freezing.
Check temperatures daily at first, then several times weekly once the pile stabilizes. Temperature drops mean the pile needs turning or fresh additions.
Timing your pile construction matters tremendously.
Late fall pile building allows materials to heat up before deep winter arrives, establishing strong microbial populations that persist through cold snaps.
Mid-winter pile construction works in mild climates but struggles in harsh conditions. Plan your winter composting calendar based on your region's typical freeze dates and temperature patterns.
Indoor and Alternative Winter Methods
Vermicomposting systems work in basements, garages, or even under kitchen sinks, requiring temperatures between 55-77°F. making climate-controlled spaces ideal. Start with a pound of worms in bedding material like shredded newspaper or coconut coir. Feed them vegetable scraps, avoiding meat, dairy, and oils. Harvest finished castings every few months for potent fertilizer.
If you shop at Uncle Jim’s Worm Farm, please use our link so they know we sent you!
Bokashi composting offers another indoor option. This Japanese fermentation method uses beneficial microorganisms to pickle food waste, including materials unsuitable for traditional composting like meat and dairy. The process produces nutrient-rich soil amendment and compost tea, though you'll need outdoor space to finish the process.
Trench composting works well where ground doesn't freeze deeply. Dig holes or trenches between garden rows and bury kitchen scraps directly in soil. Materials decompose slowly over winter, enriching planting areas for spring. This low-maintenance method works best with vegetable scraps that won't attract digging animals.
Some composters maintain small indoor holding bins where materials begin decomposing before outdoor transfer. Adding effective microorganisms or compost starter to these bins jumpstarts decomposition and reduces odors.
Winter Tips and Tricks
Layer carbon-rich browns with nitrogen-rich greens including kitchen scraps, coffee grounds, and manure.
Consider tinkering with your usual carbon-to-nitrogen ratio. For example, in a backyard setting in the summer, you’d want to add about three times more carbon (leaves, cardboard, woodchips) than you’re adding nitrogen (food scraps). In the winter, you can go a little heavier on the food scraps, which fuels microbial heat production.
Kitchen scraps become your primary nitrogen (heat!) source.
A good trick is to alternate 4-6 inch layers of browns with 2-3 inch layers of greens.
Shred or chop materials smaller than usual. This increases surface area, allowing bacteria to break down organic matter even faster.
Allow nitrogen sources (food scraps) to freeze. Freezing ruptures cell walls to make materials more accessible to microbes once thawed.
Aim for a compost pile of at least one cubic yard to stay warm. Pro tip: team up with a neighbor for bulking up compost piles in the winter.
Troubleshooting Common Winter Challenges
Frozen solid piles stop decomposing entirely. If your pile freezes through, don't panic—it's essentially in suspended animation. Improve insulation for next winter, or accept passive cold composting where materials break down slowly until spring warmth returns. Resume turning and adding materials as temperatures moderate.
Soggy, compacted piles develop from excessive snow melt without sufficient drainage. Mix in dry carbon materials like sawdust or shredded leaves to absorb moisture. Ensure your pile has adequate drainage—elevate it on pallets or create a gravel base. Turn wet materials to promote evaporation and restore structure.
Ammonia odors indicate nitrogen excess and anaerobic conditions. This occurs when frozen exteriors trap gases from the active core. Add carbon materials, improve aeration, and reduce nitrogen-rich additions until balance returns. The smell should dissipate within days of corrective action.
Preparing for Spring Success
As winter ends, assess your pile's progress. Remove any insulating barriers to allow solar warming. Turn materials to redistribute decomposed and undecomposed sections. The spring heat spike often causes dramatic temperature increases as microbial populations explode. Make sure to have plenty of carbon (leaves, wood chips, or cardboard) on hand to balance out the pile and prevent odors as it heats up.
When you’re ready to apply your finished compost, sift it through half-inch mesh to separate large particles. Return unfinished materials to the active pile while spreading completed compost on gardens. This black gold, created through winter's challenges, contains beneficial microbes, nutrients, and organic matter that transform garden soil.
By composting through winter, you've transformed would-be waste into valuable soil amendments, reduced methane emissions from landfills, and created a continuous cycle of nutrient recycling. Your garden will reward this dedication with improved soil structure, enhanced microbial diversity, and healthier, more productive plants.